Making Custom Connector Cables
My PIC programmer has a 6-pin ICSP header that I've been using to program the breadboard prototypes of my Ifos controller.
Each prototype has a matching header and I simply connect it to the programmer with a straight-through ribbon cable. For the “real” version (or at least the real prototype version), I decided an RJ25 jack would be more convenient, wired for compatibility with Microchip’s MPLAB ICD 2.
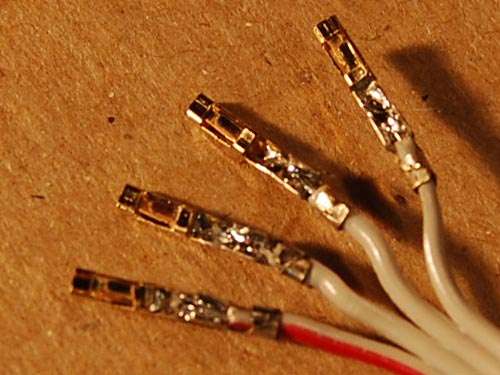
Since I don’t have the ICD 2 at the moment, I needed a cable that would allow me to connect my current programmer to the new jack. Having already gone to the trouble of determining the pinouts of both systems (a real pain for both, by the way), it seemed like a fairly straightforward task. I sat down and started cutting, stripping, soldering, and crimping one end of a 6-conductor phone cable.
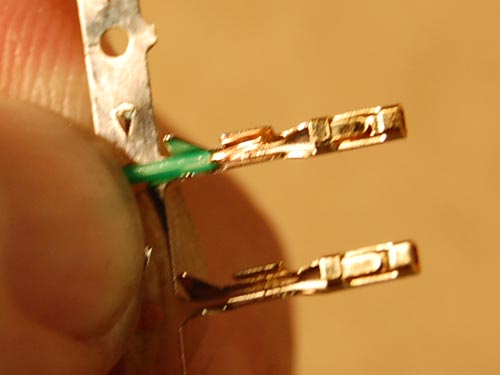
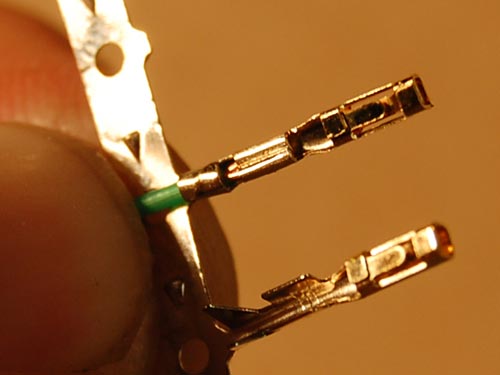
After 15 minutes, I was frustrated. The conductors were stranded 28 AWG—very fine, and prone to breaking just as I crimped them, or finished soldering them to the female pins, or (especially) as I inserted the pins into the plug. The solder also had a tendency to migrate down into the pin channel, interfering with the connection and preventing the plug from seating completely.
In the midst of this torture, I dimly recalled buying a crimping tool in the distant past; maybe it was time to dig through the tool chest and find it.
If there’s one thing I should know by now, it’s use the right tool for the job. My manual crimping (with needle-nose pliers) was so poor, no wonder I needed to solder the joint. With the dedicated crimper, on the other hand, the connection was so tight that no solder was needed. That eliminated a slow, cumbersome, and error-prone step. I had my connector cable in about 3 minutes.