Soldering for Family Harmony
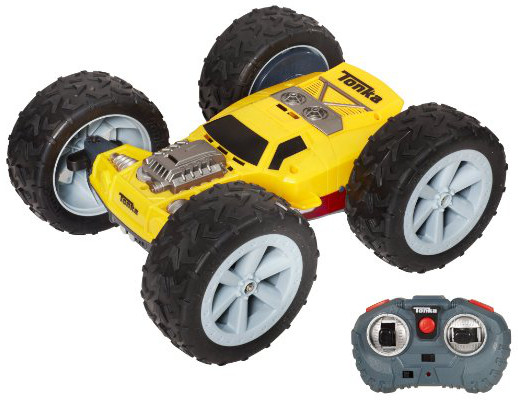
Santa brought the boys two Tonka Ricochet Replay R/C cars on Sunday, a blue/green one for Zane and a yellow/red one for Aidan. Unfortunately, only Zane’s worked, putting a damper on Aidan’s Christmas, since Zane was having too much fun to share.
We could have arranged a return or exchange with Santa, but what a hassle. On the other hand, today’s solid-state, chip-on-board toys made a user repair iffy. The disappointed kid moping around the house demanded an immediate response, though. I had to think of the children.
No Power
At first, Aidan’s car worked flawlessly with the yellow side up. (These cars are designed to flip over and don’t really have a preferred “top” side.) However, he noticed right away that the red side stuttered like crazy, and never got up to top speed at full throttle. After a few minutes the drive wheels became unresponsive, and recharging/swapping batteries and controllers didn’t help. Time for some toy surgery.
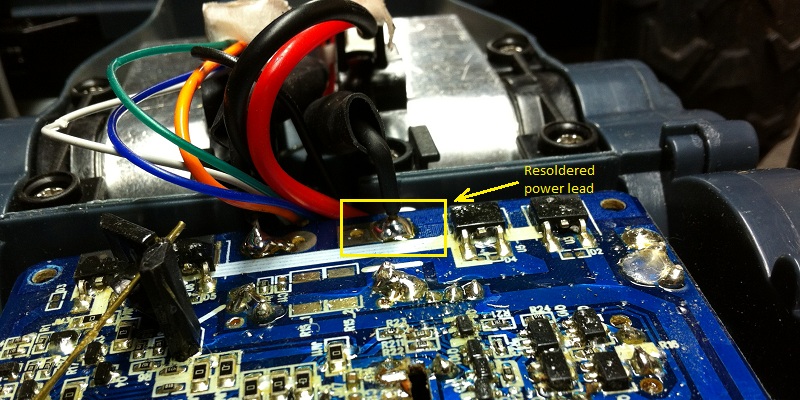
The power problem was easy to diagnose as a loose wire. I could see where a main power lead had come unsoldered, probably because it hadn’t been fluxed properly. Once the solder connection was repaired, we had power again.
Stuttering
On inspection, I couldn’t see any physical problem with the drive train, so I started looking at Zane’s working car to see what happened when it flipped over. Turns out the drive wheels reverse direction. Ah ha! This clever feature ensures that the car moves “forward” no matter which side faces up, and clearly relies on some orientation indicator. After a bit of searching, I found it: a ball switch mounted on a tab underneath the main board.
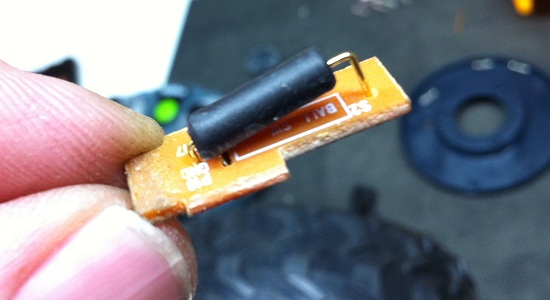
The tab moved quite a bit under finger pressure, and its solder pad traces appeared to have delaminated. I removed it, then discovered a solder bridge between two of the terminals. No wonder the car stuttered. In the red-side-up position, the ball switch indicated both sides were up. The drive motor was constantly switching polarity, trying to maintain “forward” motion in opposite directions.
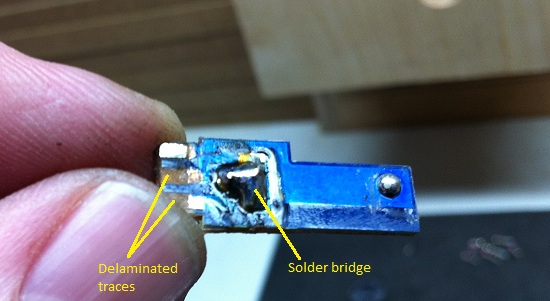
I removed the solder bridge but the traces were irreparable, so I soldered wire directly to the switch terminals.
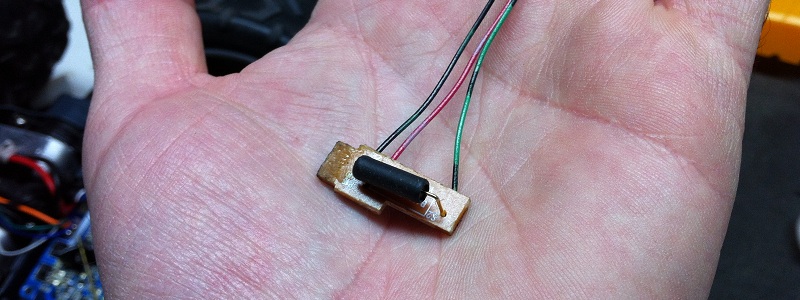
With the tab hot-glued back in place, I brought the leads around to the top of the main board and soldered them to the correct pads. A quick test showed the stuttering was gone.
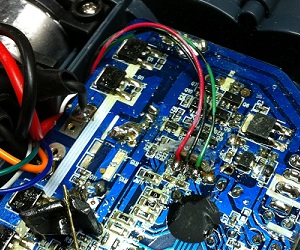
Refurbished?
How could Aidan’s car have left Santa’s workshop in this condition? As a weird coincidence, I also had to repair a broken controller for an R/C helicopter he brought Zane. Again, a wire had come loose and required soldering.
What up, Santa? Seriously, flux your joints!